
UnityCelShaderFX
Editor tools
PROFESSIONAL-GRADE EDITOR TOOLSET
CelShaderFX was built with the belief that artists should never have to write code or edit shader files by hand. Every feature is exposed through a clean, purpose-built editor UI that works across all three render pipelines.
Pipeline-aware Setup Wizard
Section titled “Pipeline-aware Setup Wizard”Open it from the menu: CelShaderFX > Setup Wizard. The wizard reads your project’s GraphicsSettings, detects your active render pipeline, and performs all required configuration steps automatically:
-
Adds the CelShaderFX Renderer Feature to your URP asset (URP only)
-
Registers the HDRP Custom Post-Process volume (HDRP only)
-
Attaches the CelPostProcessEffect script to your main camera (Built-In only)
-
Creates a default CelShaderSettings asset in your Resources folder
-
Runs a shader compilation check and reports any missing packages
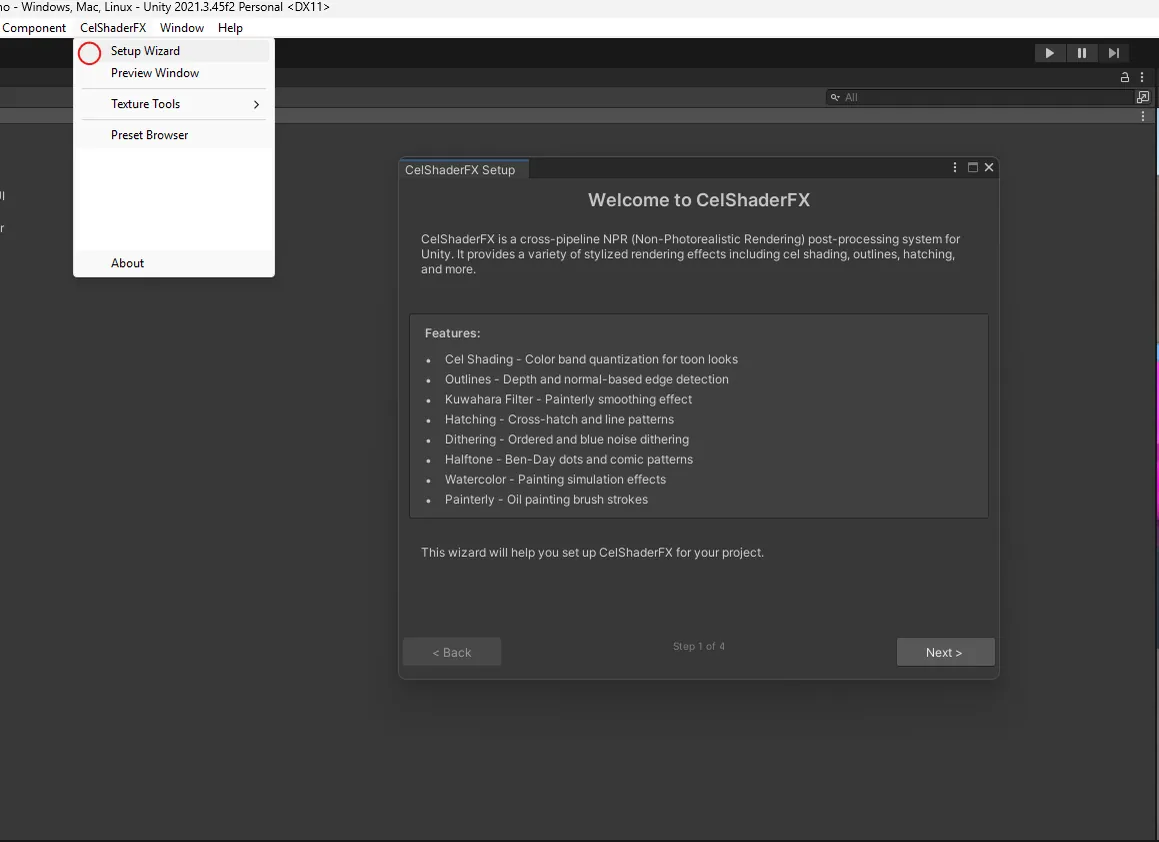
The CelShaderFX menu with Setup Wizard highlighted, and the Welcome to CelShaderFX wizard window.
Visual Preset Browser
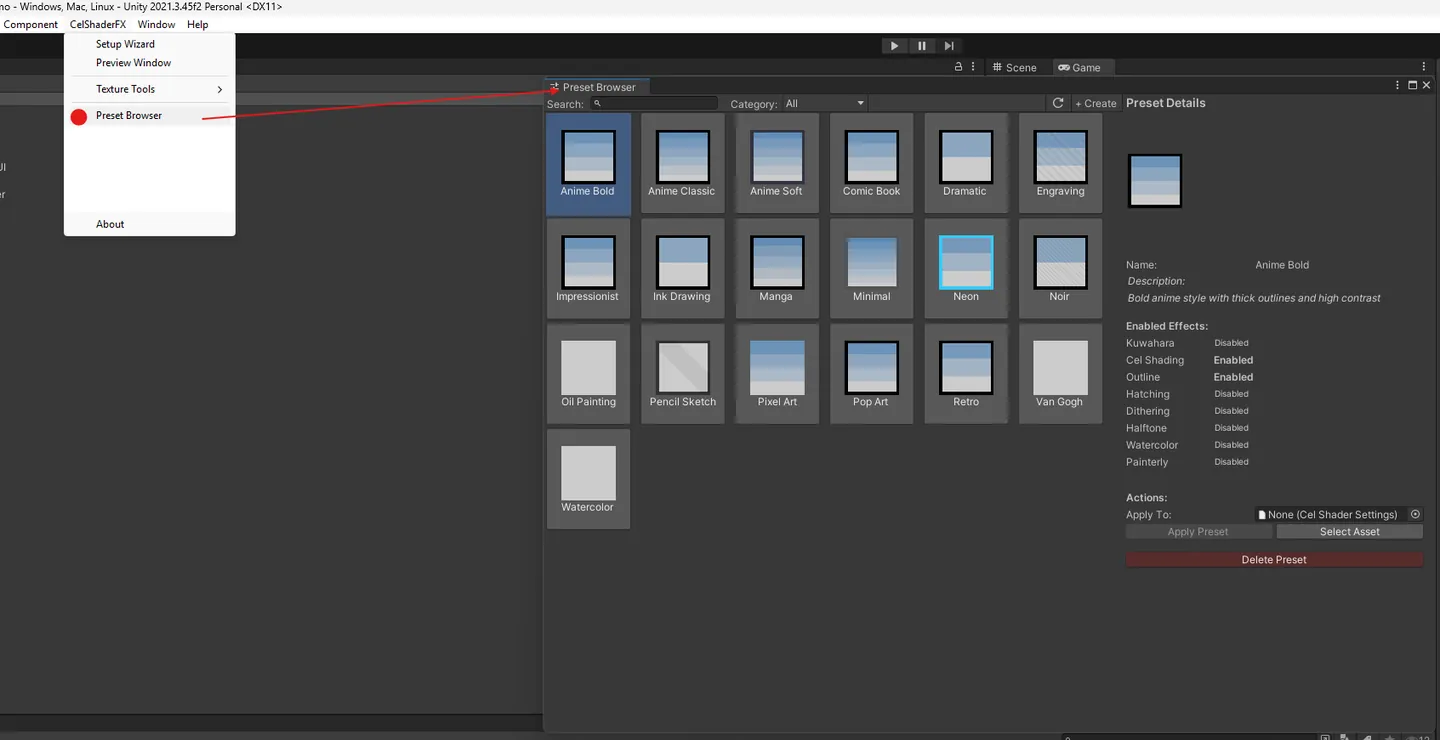
Section titled “Visual Preset Browser”Access from: CelShaderFX > Preset Browser. A full-window panel that shows all available presets as visual cards. Each card displays the preset name, style category (Anime / Sketch / Painterly / etc.), and a thumbnail. Click to apply instantly to the active camera — with full undo support.
Included presets: Anime, Manga, Watercolor, Oil Paint, Pencil Sketch, Chalk, Neon Noir, Pastel Dream, Woodblock Print, Retro Game, Tonal Ink, and Flat Design.
Save your own presets with a name and thumbnail from any configured settings. Presets are ScriptableObjects — version-control friendly, shareable across team members.
Modular effect inspector
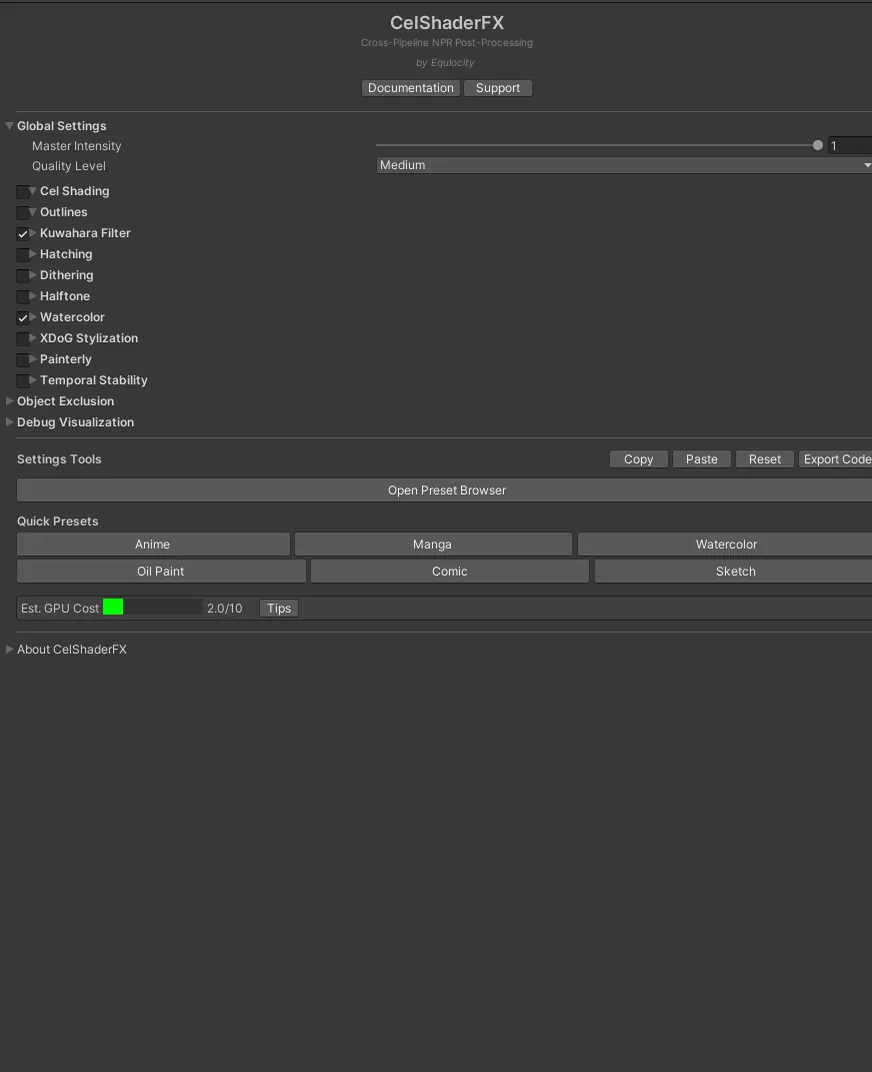
Section titled “Modular effect inspector”The CelShaderSettings Inspector organises all 8 effect modules into collapsible sections with clear headers, descriptive tooltips on every parameter, and contextual warnings when conflicting settings are detected (e.g., enabling both Kuwahara and XDoG at maximum strength). Each module can be toggled independently — enabling only what you use keeps your GPU cost minimal.
Live debug overlay (Ultimate)
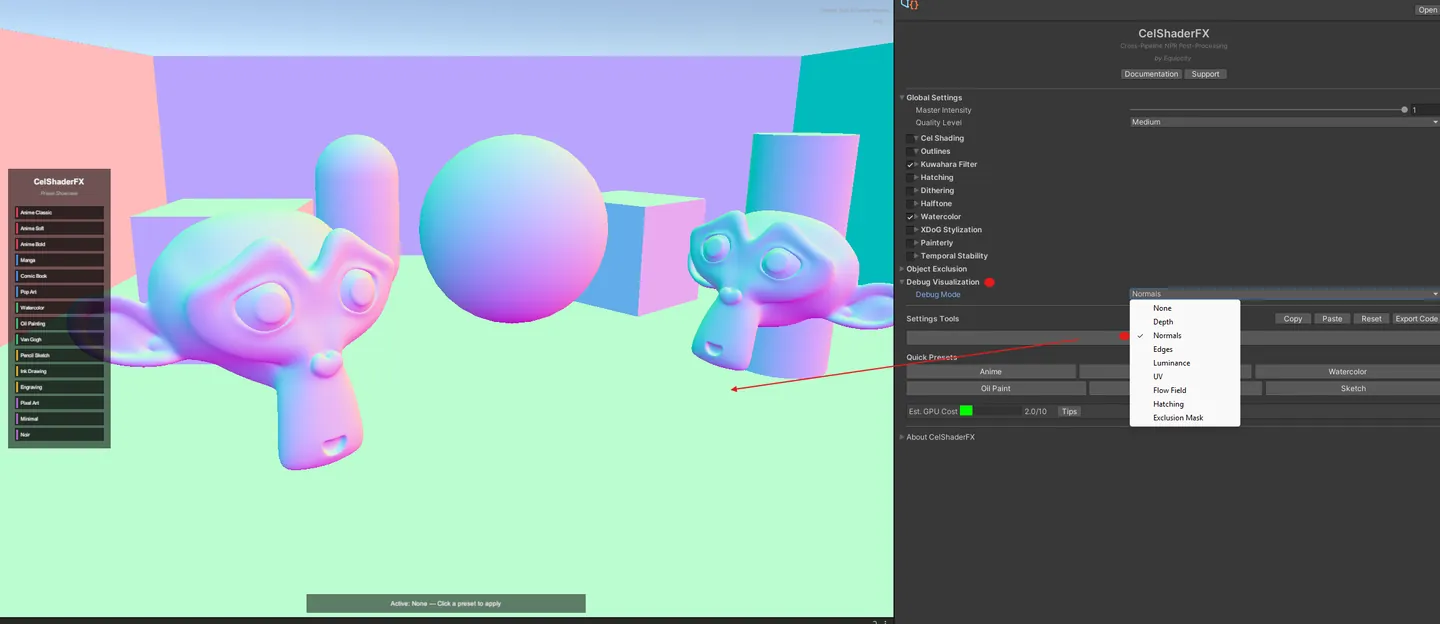
Section titled “Live debug overlay (Ultimate)”Select any debug view from the Inspector dropdown:
- Scene Color (final composited output)
- Depth Buffer (raw or linearised)
- Normal Buffer (world-space or view-space)
- Edge Detection Mask (per outline method)
- Cel Bands (quantised luminance only)
- Hatching Mask (density and direction)
- JFA Distance Field (signed distance visualisation)
- Per-module isolation (e.g. Kuwahara only, XDoG only)
The overlay renders in both the Scene View and Game View simultaneously, making it ideal for in-editor review sessions and demo recordings.
Texture generators
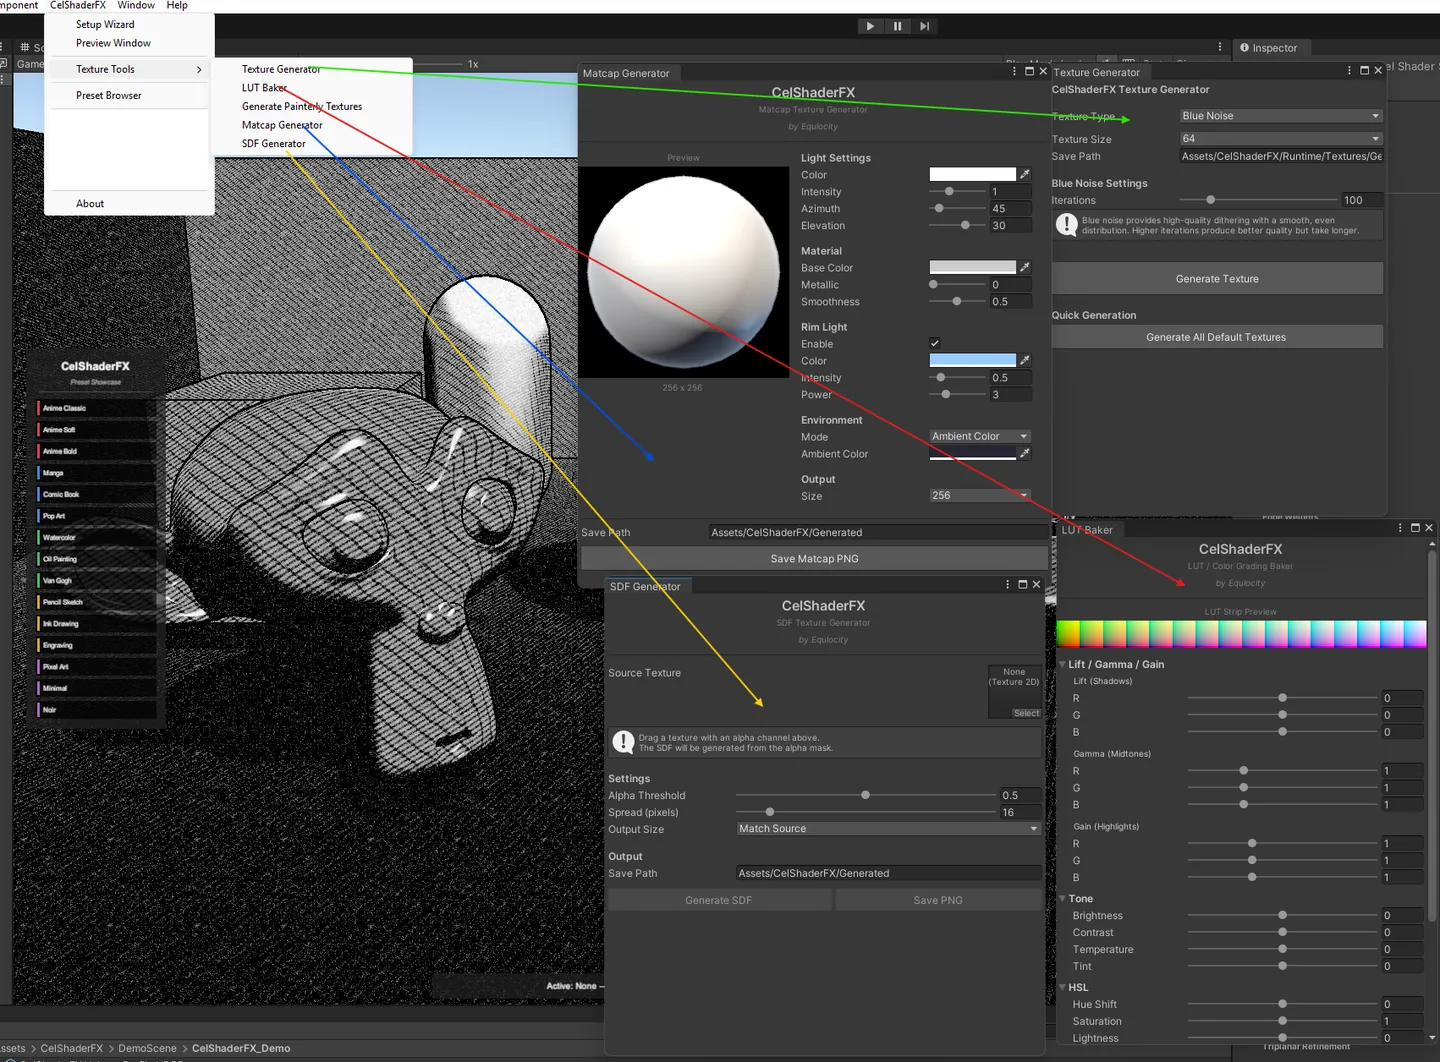
Section titled “Texture generators”Generate tiling hatch pattern textures at any resolution directly in Unity. Access from: CelShaderFX > Generate Textures. Choose line count, angle, layer count (up to 7), and export format (PNG or TGA). No external DCC tool required.
Opens our feedback form in a new tab with the tool name pre-filled.