
Light Painter
Light Painter
Section titled “Light Painter”Module: Design · Category: LevelDesign · Tool ID:
LightPainter
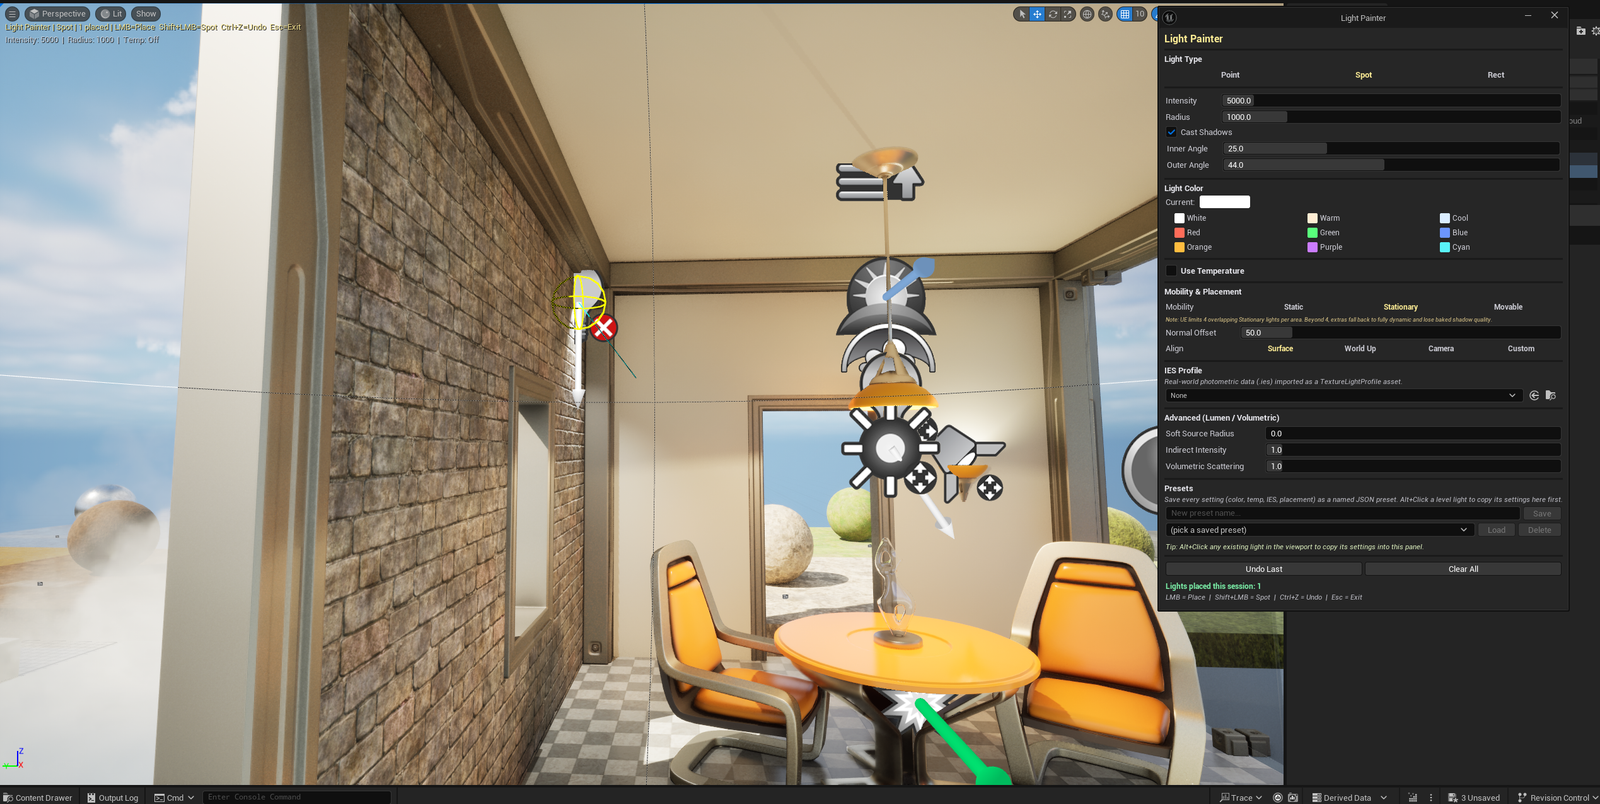
A Hub-launcher tool for an EdMode that lets you paint lights directly into the level. Pick light type (Point / Spot / Rect / Directional), set color / intensity / attenuation in the viewport panel, then click in the viewport to place. Drag to set rotation. Faster than the standard place-actor workflow when you’re authoring lighting iteratively.
When to use it
Section titled “When to use it”- Iterative lighting passes — placing many lights quickly without going through Place Actors menus
- Authoring atmosphere lighting — lots of small fill lights in a scene
- Stylized / non-photorealistic lighting — when you want artistic control over individual light placement
- Pre-lighting blockout — placing rough lighting on a whitebox
When not to use it
Section titled “When not to use it”- Don’t use this for global / hero lighting — sun, sky, hero key lights deserve manual placement and tuning
- Don’t expect this to author baked lighting — it places lights; baking is a separate Build Lighting step
Opening the tool
Section titled “Opening the tool”- Open the EQLabs Hub and search for
Light Painter(or browse to Design → LevelDesign) - Click the tool card
- Click Activate in the launcher
- The viewport panel for brush settings appears
Interface tour
Section titled “Interface tour”Hub launcher panel
Section titled “Hub launcher panel”| Action | What it does |
|---|---|
| Activate | Enables the Light Painter EdMode |
| Deactivate | Disables the EdMode |
| Status | Green ACTIVE / Gray Inactive |
Viewport panel (when active)
Section titled “Viewport panel (when active)”| Field | What it does |
|---|---|
| Light Type | Point / Spot / Rect / Directional |
| Color | Light color (click to open picker) |
| Intensity | Light intensity in unit (lumens / lux / candelas depending on type) |
| Attenuation Radius | Falloff distance (Point / Spot / Rect) |
| Inner / Outer Cone Angles | Spot-only |
| Mobility | Static / Stationary / Movable |
| Cast Shadows | Toggle |
Painting
Section titled “Painting”- Click in viewport: place light at hit point with brush settings
- Click + drag: place light, then rotate to face drag direction
- Mouse wheel: resize attenuation radius / cone angle on the most recent light
Workflow
Section titled “Workflow”- Click the Hub tool card, then Activate
- Pick light type in the viewport panel
- Set color, intensity, attenuation
- Click in the viewport — light is placed
- Repeat to author the scene
- Click Deactivate to exit; placed lights remain in the level
Settings reference
Section titled “Settings reference”Brush settings persist via the EdMode’s state.
Output
Section titled “Output”ALight-derived actors —APointLight/ASpotLight/ARectLight/ADirectionalLightinstances in the level- Undo — placement wrapped in
ScopedTransaction.Ctrl+Zreverses
Tips & gotchas
Section titled “Tips & gotchas”- Mobility matters for performance — Static / Stationary lights affect lighting bake; Movable doesn’t bake
- Mouse wheel sizes attenuation while pointing at the most recent light — works best for incremental tuning
- Press Escape to exit the EdMode
- Painted lights count toward your movable-light budget — see Lighting Scenario Auditor for project-wide audit
Related tools
Section titled “Related tools”- Lighting Scenario Auditor — audit the lights you’ve placed
- Post-Process Volume Inspector — apply PP presets to complement lighting
Report an issue with this tool
Opens our feedback form in a new tab with the tool name pre-filled.