
No. 0783 DE DesignEQLabs Pro
LUT Color Grading Baker
Module: Design · Category: Cinematic · Tool ID:
LUTColorGradingBaker
A three-tab LUT authoring tool. Generate builds LUTs from manual grading parameters (Lift / Gamma / Gain, HSL, tone, per-channel curves). Extract generates high-quality LUTs from reference images using histogram-matched color transfer in CIE Lab space. Preview shows the LUT strip and exports as PNG or UTexture2D UE asset. Output drops directly into Post-Process Volume’s Color Grading LUT slot.

When to use it
Section titled “When to use it”- Authoring cinematic LUTs from scratch with film-style controls
- Extracting a LUT from reference imagery (a still from a film, a concept piece) via histogram-matched transfer
- Building a project’s color-grading LUT library
- Creating per-region / per-zone LUTs for stylized-look projects
What it isn’t for
Section titled “What it isn’t for”- Don’t use this for runtime color grading. It bakes static LUTs that PP volumes consume.
- Don’t expect this to replace DaVinci Resolve / Nuke. Single-LUT authoring tool, not a full grading suite.
Opening the tool
Section titled “Opening the tool”- Open the EQLabs Hub and search for LUT or
Color Grading(or browse to Design → Cinematic). - Click the tool card.
- Use the tab bar: Generate, Extract, Preview.
Tab 1: Generate from Parameters
Section titled “Tab 1: Generate from Parameters”Build a LUT from manual grading controls.
Controls
Section titled “Controls”| Field | What it does | Default |
|---|---|---|
| Lift | Shadows color | (0, 0, 0) |
| Gamma | Midtone color | (0.5, 0.5, 0.5) |
| Gain | Highlights color | (1, 1, 1) |
| Hue Shift | -180° to 180° | 0 |
| Saturation | 0 to 2 | 1.0 |
| Brightness | 0 to 2 | 1.0 |
| Contrast | 0.5 to 2 | 1.0 |
| Temperature | -1 to 1 | 0 |
| Per-channel Shadow / Mid / High curves | RGB channel scalars per tonal region | all 1.0 |
| LUT Size | 16 / 32 / 64 | 32 |
Click Bake LUT to compute. The LUT preview updates in the Preview tab.
Tab 2: Extract from Reference Image
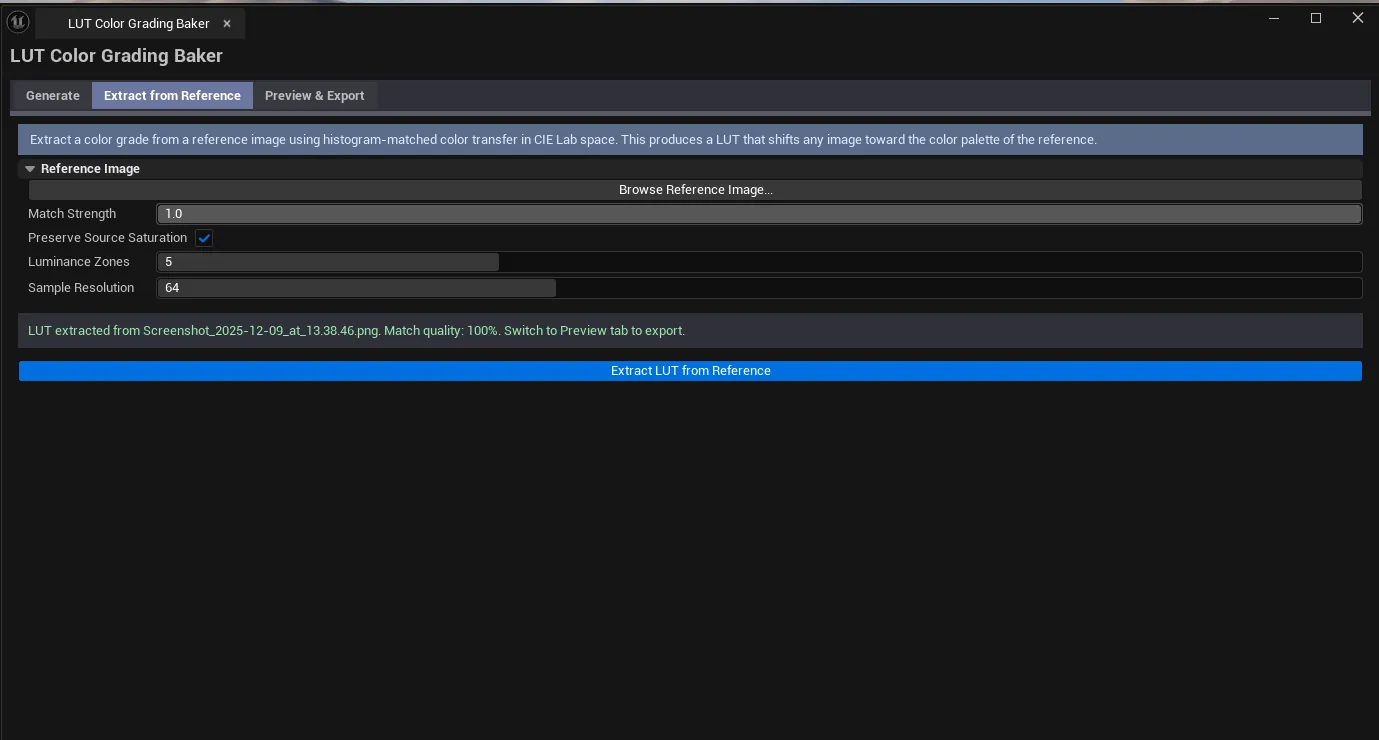
Section titled “Tab 2: Extract from Reference Image”Generate a LUT that maps the current viewport / source image to match a reference image’s look.
| Field | What it does | Default |
|---|---|---|
| Reference Texture picker | The “look” image to match | (empty) |
| Match Strength | 0–1 blend with neutral LUT | 1.0 |
| Preserve Saturation | Keep source saturation when transferring | false |
| Zone Count | How many luminance zones to split the transfer into | 5 |
| Sample Resolution | Subsampling resolution for speed | 64 |
| Extract from Reference | Runs histogram matching in CIE Lab space |
How it works
Section titled “How it works”The reference image is converted to CIE Lab. Per-channel histograms of L, a, b are matched between source and reference. Optionally split into N zones (typically 5: shadows / lower-mid / mid / upper-mid / highlights) and matched per-zone. Output is a 3D LUT.
Workflow
Section titled “Workflow”- Drop a reference texture (a film still or concept piece).
- Tune Match Strength (
1.0= full match,0.5= blend with neutral). - Click Extract from Reference.
- Switch to Preview tab to see the result.
Tab 3: Preview & Export
Section titled “Tab 3: Preview & Export”| Action | What it does |
|---|---|
| Reset to Neutral | Resets the LUT to identity |
| Export PNG | Saves the LUT strip to disk |
| Export UE Asset | Saves as UTexture2D with proper LUT compression |
The LUT strip preview shows the current LUT as a horizontal color strip.
Using the exported LUT
Section titled “Using the exported LUT”In your Post-Process Volume, set Color Grading LUT to the exported texture. Set its blend weight to control intensity.
Settings reference
Section titled “Settings reference”Per-tab parameters persist to [Project]/Saved/EQLabs/Settings/LUTColorGradingBaker.json.
Output
Section titled “Output”- PNG file. Via Export PNG.
UTexture2Dasset. Via Export UE Asset (correctly tagged as a Color Lookup Table for UE).- In-panel LUT strip preview.
Tips and gotchas
Section titled “Tips and gotchas”- LUT Size of 32 is the production sweet spot. 16 is fast but lossy; 64 is overkill for most workflows.
- Histogram matching gives different results from manual grading. Extract reproduces a look; Generate gives precise control. Both have their place.
- Zone count tradeoff.
5zones is the standard;1is global match (looks unnatural);10+over-fits. - Preserve Saturation is useful when matching warm references. Keeps source colors saturated while pulling tone from the reference.
Related tools
Section titled “Related tools”- Camera Sequencer Enhancement — author cinematic shots that consume LUTs
- Post-Process Volume Inspector — apply LUTs to PP volumes via quick presets
Opens our feedback form in a new tab with the tool name pre-filled.